Introduction
This time we share our tips on how to enable your Help Center feature via Slack Live Chat that can smoothly resolve visitor's issue almost without any human intervention.
Everybody likes to facilitate their work, resolve issues faster, receive better evaluations and overall – make life easier. If you agree with us then our advice is to pay more attention to actions and features that can automate and predetermine your communication via Live Chat.
There are some Signal Zen features that directly relate to task facilitation mentioned above. You can find a helpful tutorial on how to use the Saved Replies feature and Prerequisites Form Builder in our Blog. We recommend you to check them as well.
This time we dedicate our publication to another helpful feature that can be obtained when Slack Live Chat is integrated via SignalZen – The Help Center.
What is the Help Center feature and why is it so helpful?
Help Center is a powerful tool that can potentially solve visitor's issue without any of your agent's intervention. Briefly, it's like a FAQ section on your Live Chat that meets your website visitor once he is on the Live Chat widget.
What you have to do is perform in-depth review, investigate and prepare this FAQ section carefully. Please note the topics should be very basic, questions - direct and clear, answers – brief. This is not a full story time with all possible outcomes presented. Why? Visitors often get scared of long read and immediately insist on real-time chat, remember your goal is to optimize.
Depending on how many topics you want to add, the Help Center can be structured into sections where you can build up a list of common concerns. Very important – this FAQ section comes with our fully integrated multi-language feature which means that your visitors will be very pleased to get the information in their home language. Professional? Absolutely!
So, this Help Center is very useful for those who are eager to save time, want efficiency and professional look. This helps to reduce number of chats that reach the operators, empowers your website visitors to act independently and get to the information they wanted faster.
How does the Help Center feature work?
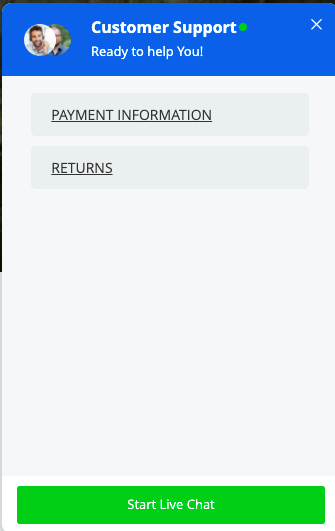
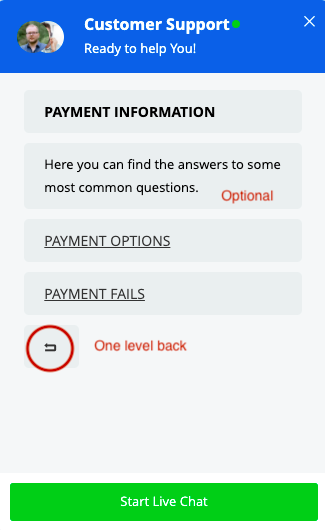
Once you set up the Help Center feature on your Slack Live Chat correctly, your visitors will be able to see all the sections you've added on the widget. They can choose the one they need and enter to find more specific topics.
During the browsing session whilst digging for more information, the visitor will be able to start a real-time chat with your agents and get further, more specific support.
Create the sections of your Help Center on Slack Live Chat integration via SignalZen Console
At SignalZen we give you an opportunity to connect to your Slack Live Chat using 3 different ways: Slack Software, SignalZen Console, Mobile Apps (iOS & Android). Below we provide the instructions on how to prepare the feature via SignalZen Console.
Step #1
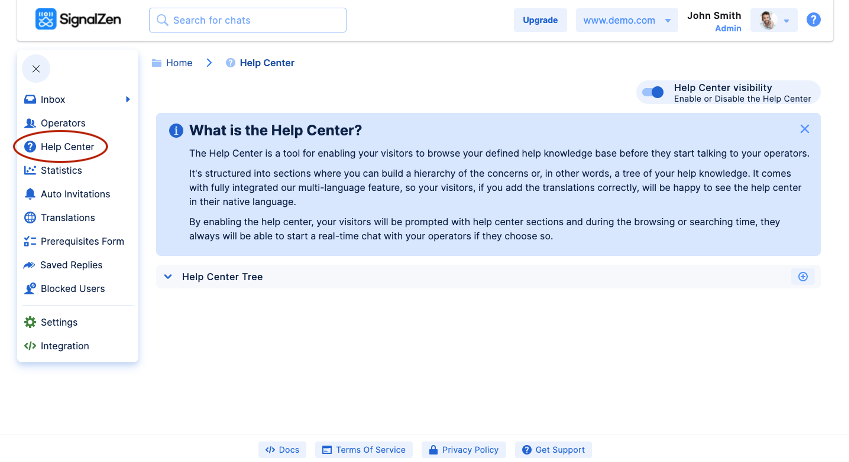
Connect to SignalZen Console and select the Help Center feature on the menu.
Step #2
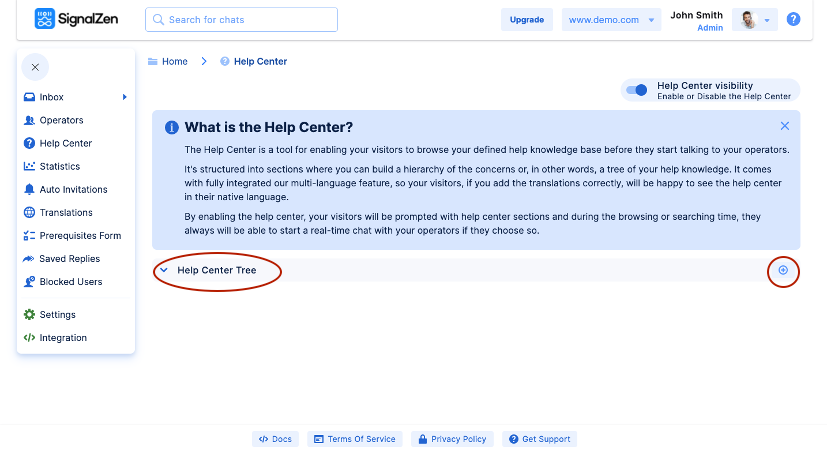
According to the information you've already prepared start creating the hierarchy of the Help Center by pressing the "+" option.
Step #3
You can add several principal sections by using the "+" option at the top of the dashboard.
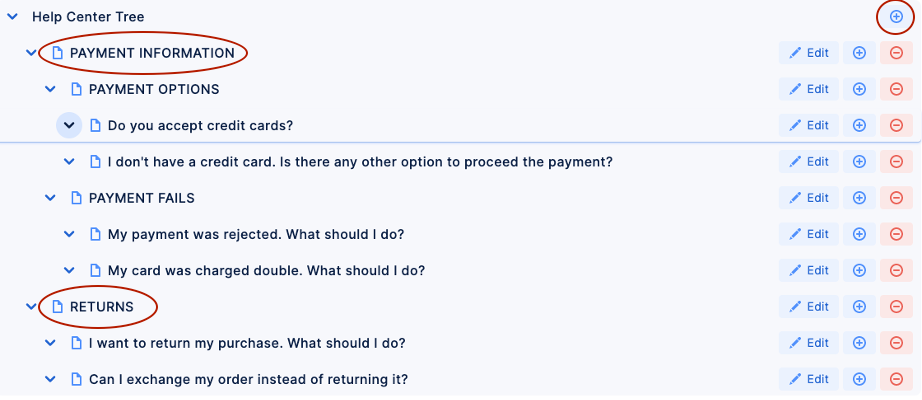
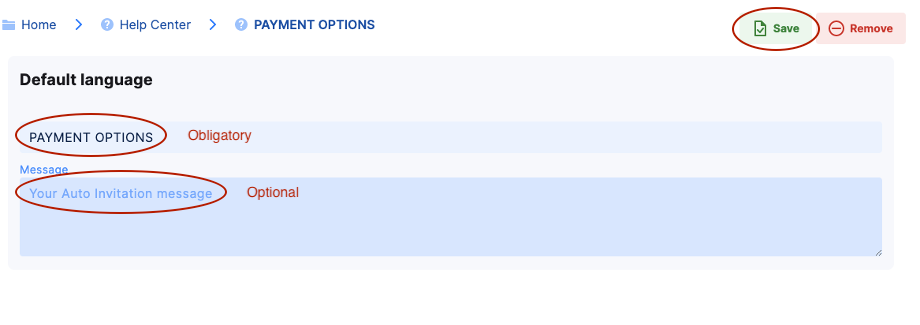
Adding the title. The rest is for you to choose. You can leave the message field blank or provide some information in the field located below. After you create the section make sure to press SAVE.

Step #4
Any principal section can have subsections. To create a subsection, use the "+" sign that is at the level of the principal section.
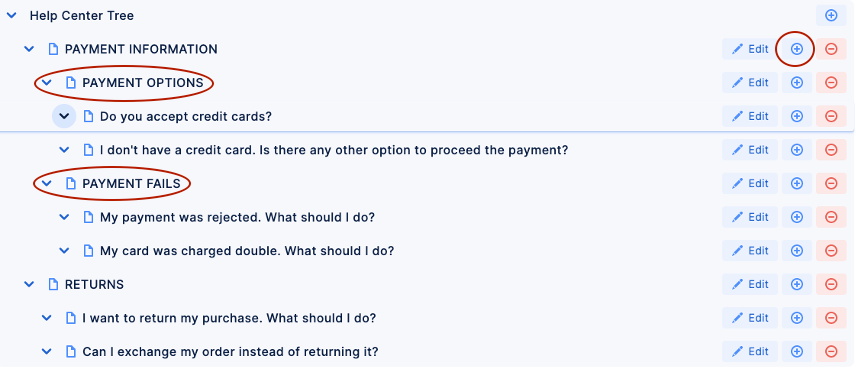
Adding the title. Add the title and do not forget to SAVE it before you go one level up.
Step #5
Any subsection may have several questions or topics. Add them by pressing the "+" sign at the level of the subsection.
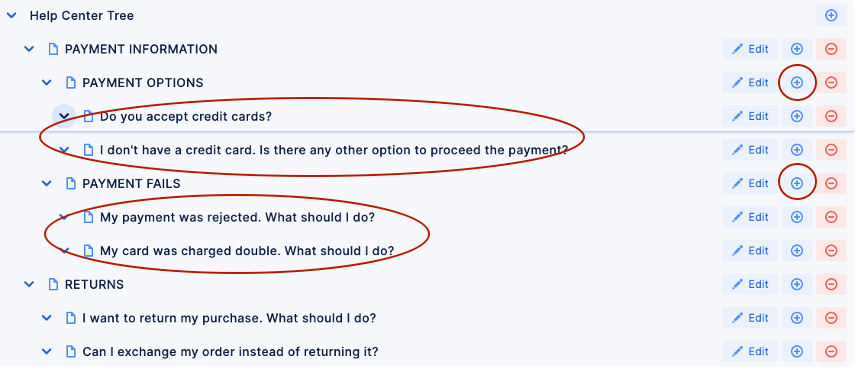
When the information is added, don't forget to SAVE it.

Step #6
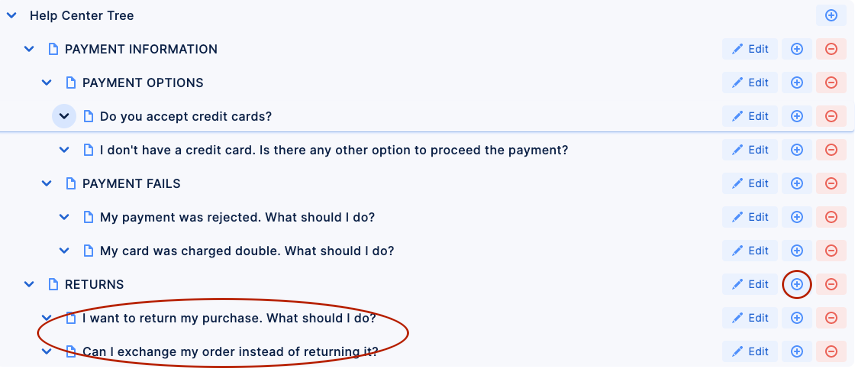
If your principal section doesn't have subsections, simply use the "+" sign to add new questions and answers.
Edit/Erase the sections of your Help Center on Slack Live Chat integration via SignalZen Console
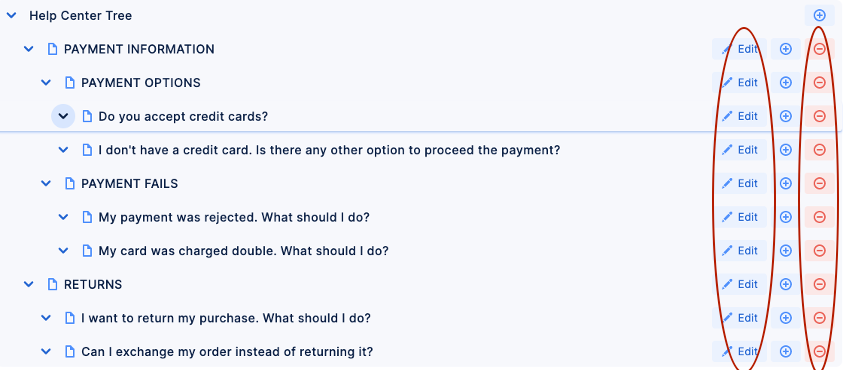
Editing or erasing a category is also just as simple as creating it. You have already noticed the "-" sign (delete) and Edit options appear together with Create button, so you can add, edit or remove sections to suit your needs any time.
Is there anything else you should know to make it functional?
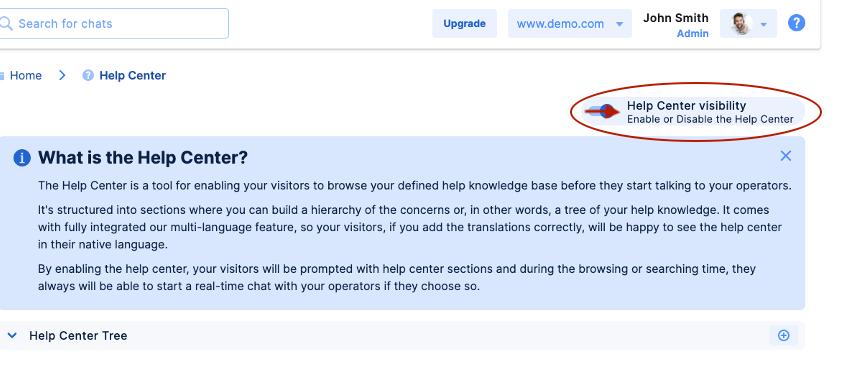
Actually, yes. There is one button at the top of the main Help Center dashboard. If you would like all your work saved and reflected on the Slack Live Chat widget, enable it and keep it enabled when making any changes, adding, editing or erasing the information.
Are you ready to see how the Help Center looks like on your Slack Live Chat integration?
Here you go!
That's it for the moment. Create your Help Center and in case of any queries, do not hesitate to contact us via SignalZen Live Chat.
